How To Set Up A Facebook Page
If you want to attract an audience via social, you’re going to need to know how to set up a Facebook page. Here’s how to build one step-by-step.
Is it too late to learn how to set up a Facebook Page?
And although Instagram is growing rapidly and TikTok is all-the-rage right now, there’s still no denying Facebook’s status as the go-to social network for doing business.
In fact, many small and local businesses still use Facebook as their primary channel for bookings and customer communication.
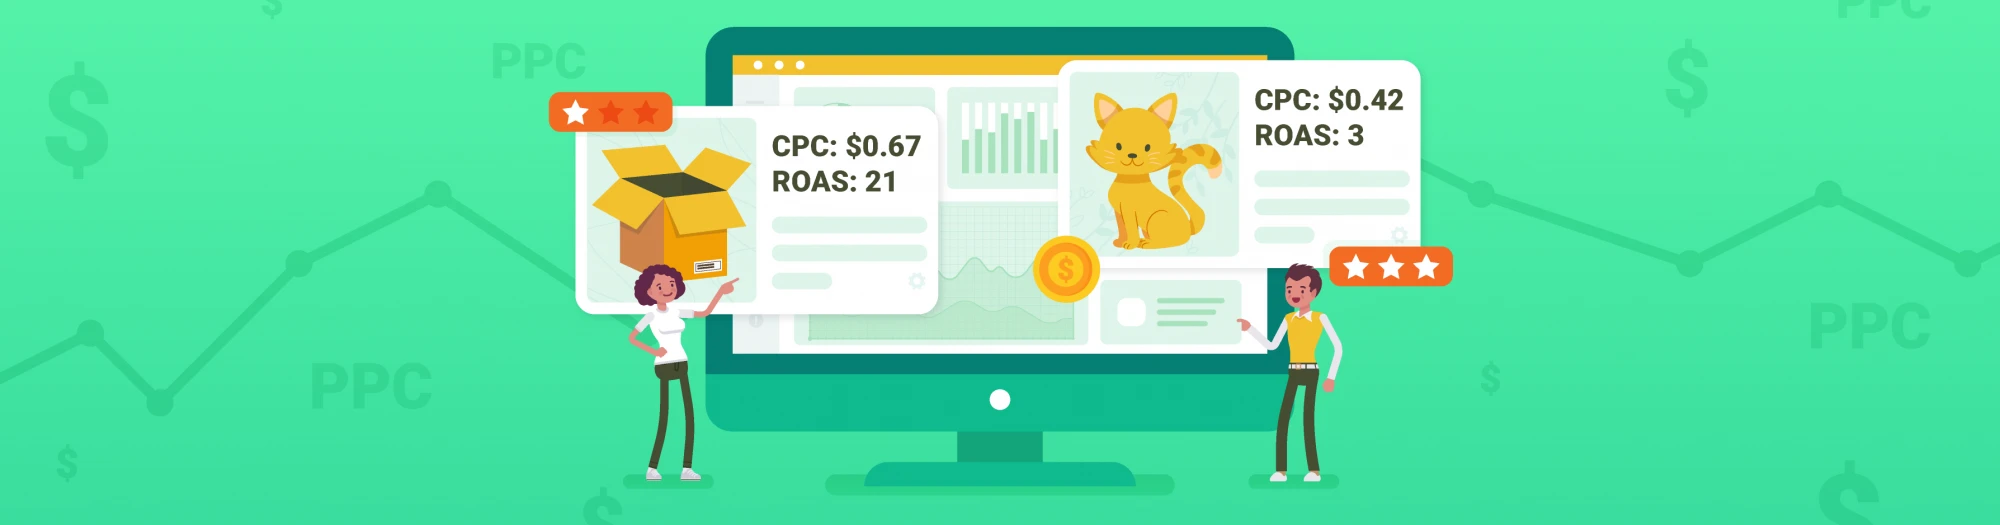
Whether you’re looking to build a community or eventually run ads, it all starts with building out your initial Facebook Page.
In this guide, we’ll break down everything you need to know to set up your Page for success from the word “go.”
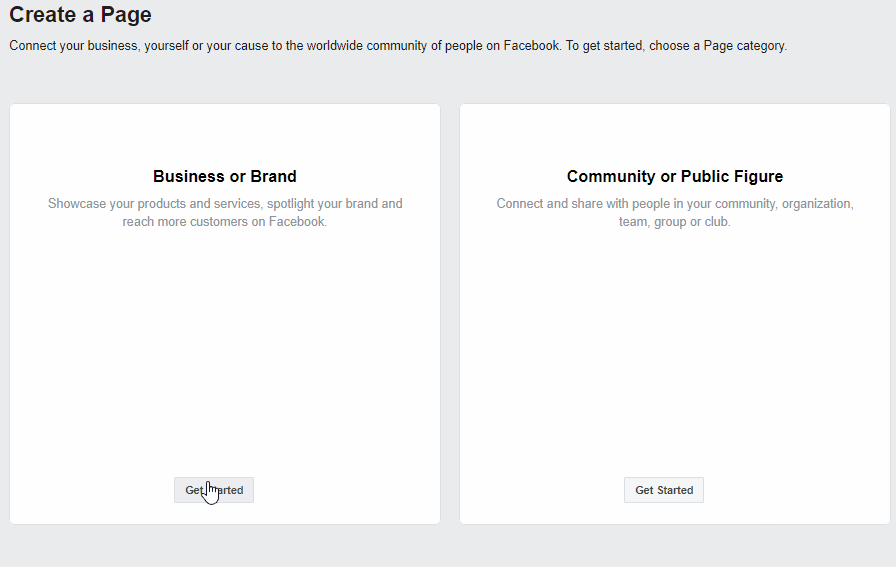
1. Start by Choosing a Business Category and Template
Facebook makes the process of getting started fairly straightforward.
For starters, you’ll be prompted to choose a Page name and business category based on Facebook’s default list (think: restaurants, ecommerce, retail and so on).
The good news is that not much in terms of your Facebook Page is set in stone, so don’t agonize over this too much. Want to change your business’ category, title or username down the line? No problem.
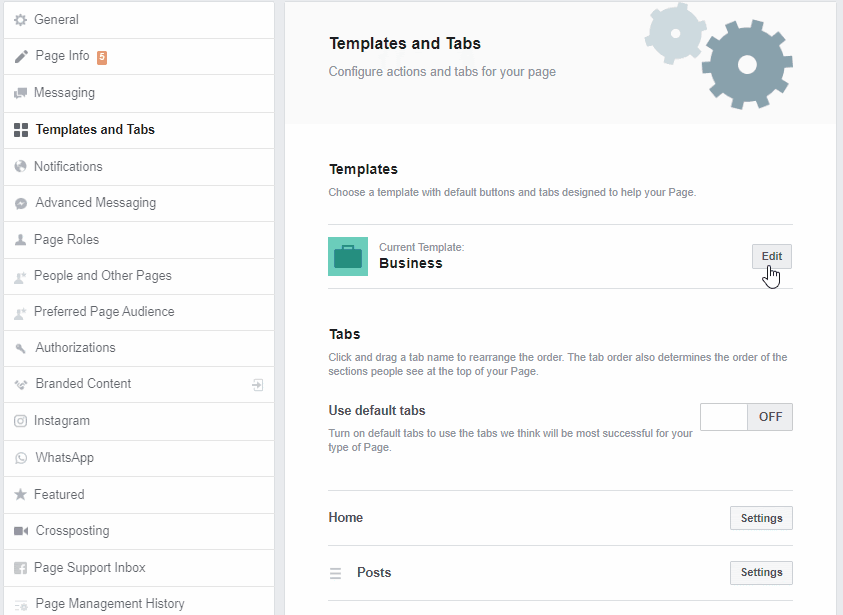
At this point, your Facebook Page is basically a blank canvas. Prior to filling in details, however, pick an appropriate template (select “Edit Page Info” ---> “Templates and Tabs”).
Templates automatically populate buttons and tabs relevant to your business type. Once you apply a template, you can add or take away tabs accordingly. For now, however, we’ll stick with the default settings.
From here you can begin making edits to your profile based on your business’ tabs. However, for the sake of this guide we’re going to start with images instead.
NOTE: After you’ve completed filling out your Facebook Page details and appropriate tabs (more on that later), you might want to consider removing irrelevant tabs to make your Page less cluttered and clearer to navigate For example, you don’t need a “Live” tab if you’re not regularly publishing Live video.
2. Pay Close Attention to Your Profile Images
Simply put, “looking the part” is a big deal on Facebook.
Perhaps the best way to signal your professionalism and stand out from the crowd? Imagery.
Note that your Facebook images (profile and cover photos) are likely the first elements of your Page someone will see when they land on it. It’s crucial that your images are optimized and appropriate for the platform.
On that note, keep in mind that three-fourths of Facebook users only access the platform on mobile devices. This means that your images can’t be too “busy,” ideally containing legible text and a color scheme that pops.
Here’s a great example from Virgin Australia’s Facebook via mobile.
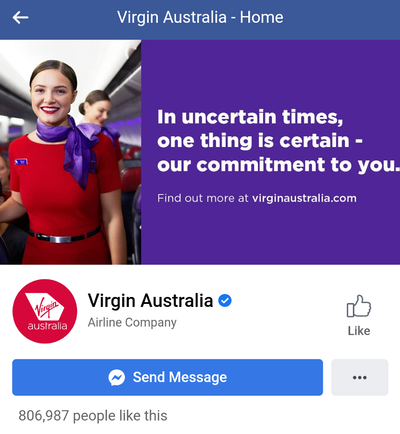
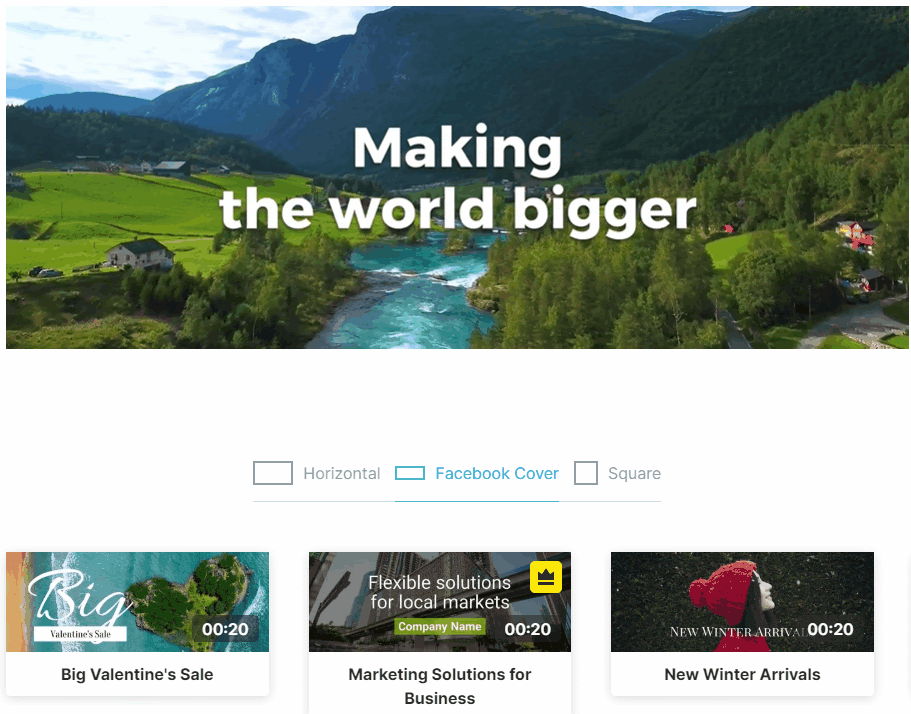
Let’s start with your profile picture, sized at 180x180 pixels. Many brands go with a sort of icon-style, clear vector image that’s easy to read. Again, profile images should ideally be minimalist and not too crowded.
Now, onto your cover photo. You have a bit more room to work with at 820x312 pixels, making your cover photo the perfect space to:
- Show off a high-res photo of your team or service
- Display an announcement for your latest product or promotion
- Highlight your up-to-date store hours and contact information
You might also consider taking advantage of cover videos to really grab the attention of visitors. Cover videos need to be between 20 and 90 seconds long, ideally at a 16:9 aspect ratio.
If you’re not much of a creative whiz when it comes to images, don’t sweat it. You can use tools such as Canva to put together colorful (and Facebook optimized) cover photos based on their pre-built templates.

The better your profile looks at a glance, the more likely you are to attract followers.
3. Go In-Depth When Filling Out Your Business’ Details
When it comes to filling out your Facebook Page, don’t skimp on the details.
Going in-depth in terms of your business’ information is crucial. The more relevant keywords and terms you include throughout your profile, the easier it is to get discovered via Facebook and search engines alike.
For example, Facebook Pages often show up alongside review platforms and business sites in Google search.
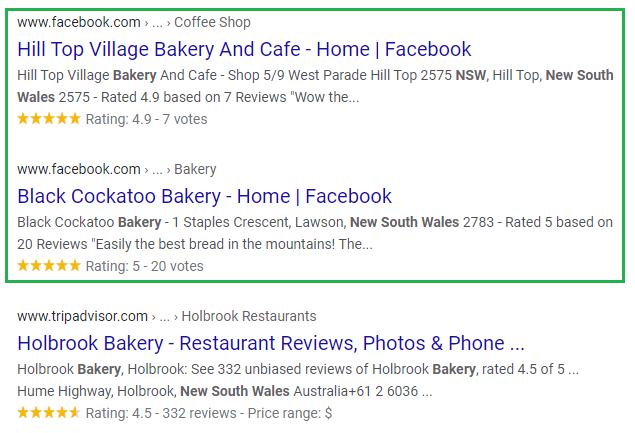
Note that we’re not talking about spamming or keyword stuffing here. Instead, just make sure that you’re using the real estate on your Facebook Page when highlighting who you are and what you offer.
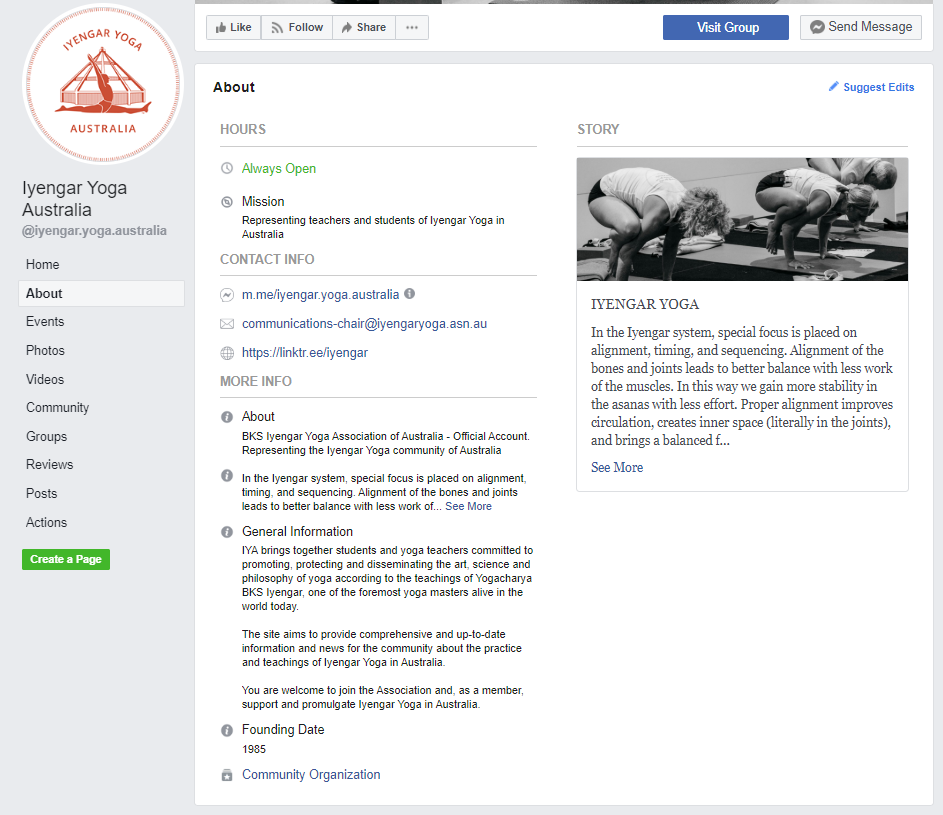
For example, consider your “About” section (“Page” ---> “About”). Here you’re able to provide a bio of your business in addition to key details and products. Make sure that all of these details are both crystal clear and correct so your leads don’t end up lost.
Imagine that someone is learning about you for the first time through Facebook. Would they be able to understand what you do and get in touch right then and there? That’s the level of detail you should be going for.
Here’s an awesome example of a comprehensive “About” section from Iyengar Yoga Australia:
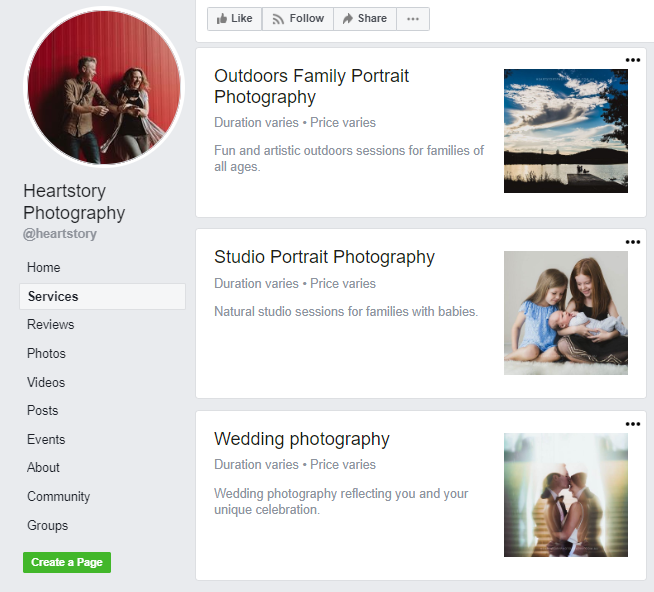
Another important area of your Facebook Page is the “Services” tab. Here you’re able to highlight specific services that your business offers, a prime place to sprinkle keywords and highlight your expertise.
The takeaway here is that you shouldn’t leave any question marks for your customers when it comes to your business’ details.
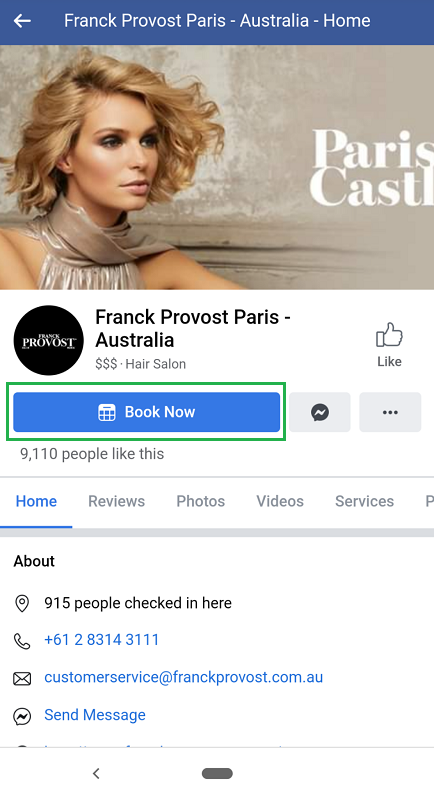
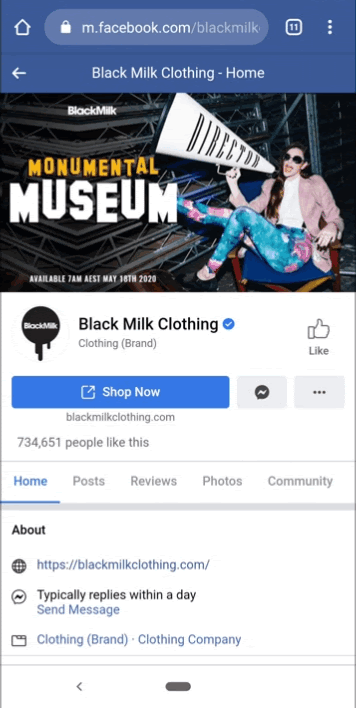
4. Pick Out a Call-to-Action to Funnel Your Facebook Traffic
Perhaps one of the most underrated but notable features of Facebook is the call-to-action button (the “Add a Button” tab below your cover photo).
Want to send your visitors to a storefront? Landing page? Booking platform? Facebook gives you all of those options and then some depending on your campaign goals. The platform has a predetermined selection of call-to-action phrases (“Book Now” or “Get Quote”) for you to choose from.
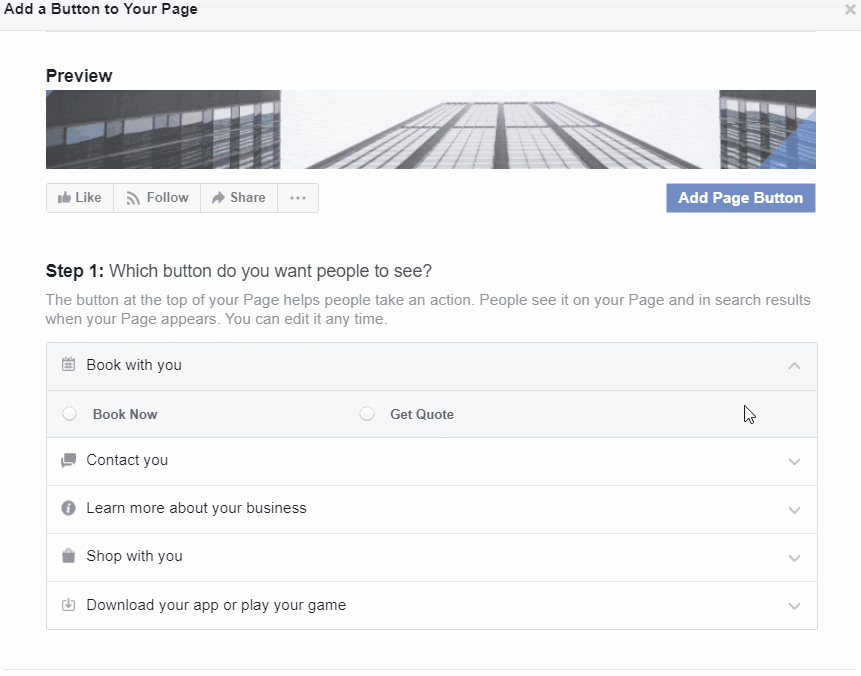
Note that you only get one call-to-action button, so it’s important to make it count. Think about what you want to get out of your Facebook traffic.
For example, are you a local business looking for more bookings and appointments from social media?
Or perhaps you want to send people to your storefront or landing page to make a purchase?
There is no “right” answer here, as long as you’re doing something to entice people to click.
5. Set Up Your Messenger to Address Customer Concerns
The last piece of setting up your Facebook Page is your Messenger settings (“Edit Page Info” ---> “Messaging” /”Advanced Messaging”).
Messenger is massively popular as evidenced by the rise of social media chatbots. From prospects to current customers, you should consider how you can use Messenger as a communication channel for your audience.
Here you can set up a greeting and automated responses, both which can help point your customer in the right direction if you aren’t available for an answer. For example, Many businesses let their Messenger serve as a place to address frequently asked questions.
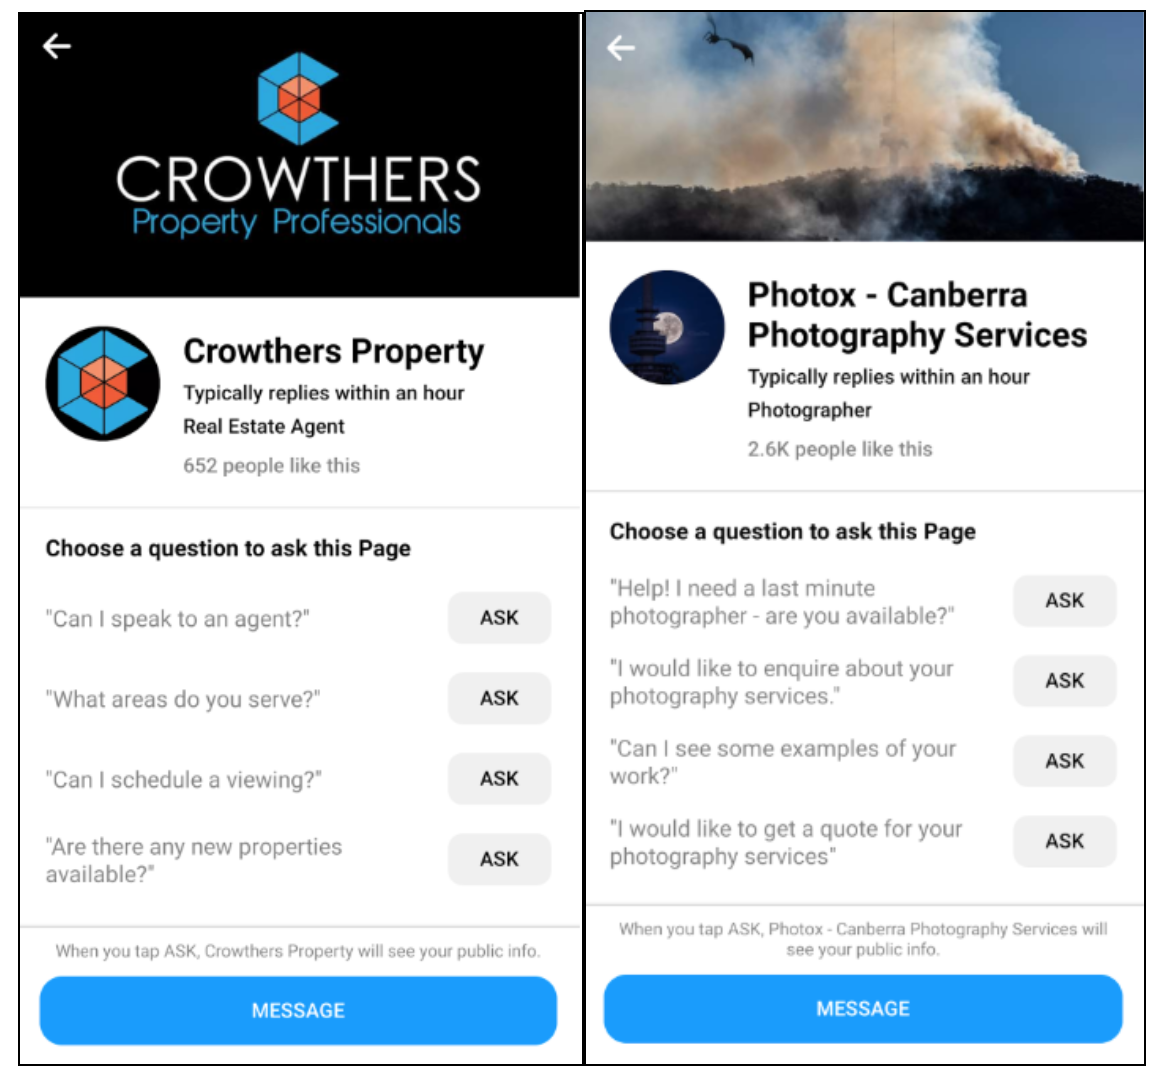
When in doubt, point your Messenger contacts to a relevant phone number or service page if you don’t have a ton of bandwidth to go back-and-forth directly. That said, you should make a point to regularly check your inbox to make sure no queries are going totally unnoticed.And that’s our guide!
Ready to put together a Facebook page?
Listen: there are plenty of moving pieces to your Facebook Page.That said, taking the time to address the basics above will make it much easier for customers to discover and engage with your business.And once you’ve gotten familiar with the platform, you can start experimenting with Facebook Business Manager and other advanced features.In the meantime, make sure to get in touch with Hello Social today if you have questions regarding how to grow your Facebook presence from the ground-up!